Built-In Mini-Apps
About
Starting and Stopping the Built-in Mini-Apps
On power on, Atom doesn’t start a mini-app by default, but starts launch mode, and you have 5 seconds to start one of them, just click the button the app assigned to. Later, you can switch to launch mode by double-clicking the power button.
You can setup Atom to start the mini-app you prefer by pressing the power button and the app’s button together. You can clear this setting by pressing the power button and the #12 (Exit/Clear) button together.
In short:
- To start a built-in mini-app, press the power button twice (double click), then the dedicated button.
- To stop the mini-app is running, press the power button twice, and the EXIT button.
- To set up a mini-app to start on power-on, hold the power button, and press the dedicated button.
- To prevent the mini-app start on power-up, hold the power button and press CLR.
Settings
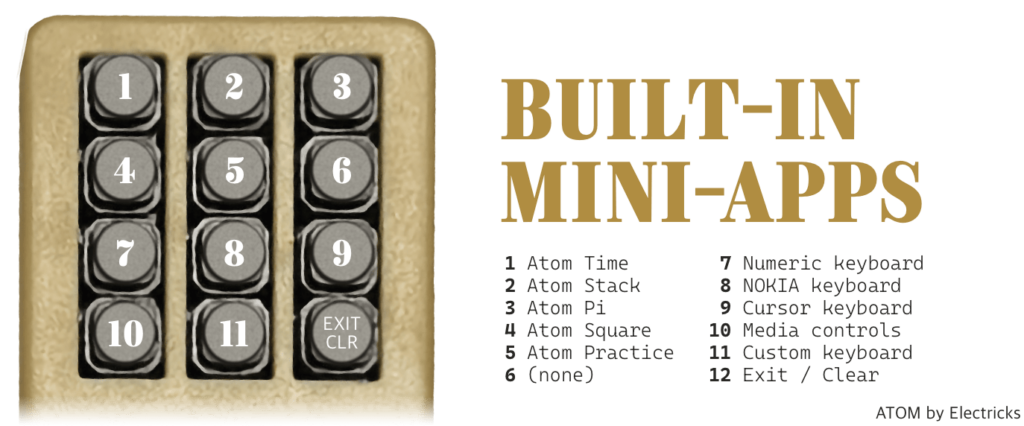
Atom has dozens of built-in mini-apps, and this number continues to grow with each new firmware release. You can configure which app is assigned to a button in several ways.

Apps Assigned to a Button (default configuration)
- #1 Atom Time – set the time on an SB Watch
- #2 Atom Stack – learn and peek at card stacks
- #3 Atom Pi – offline Pi Revelations app
- #4 Atom Square – magic square generator
- #5 Atom Practice – practice entering time
- #6 Atom Alias – to change the Bluetooth name and launch an other app
- #7 Numeric keyboard – enter numbers
- #8 NOKIA alphanumeric keyboard – enter any word
- #9 Cursor keyboard – for Inject 2 swipes (for example)
- #10 Media controls – control music
- #11 Custom keyboard – type WikiTest keywords, setup your own keyboard
Apps not Assigned to a Button
General
🎞️ Settings
📃 FAQ
Built-In Mini-Apps
📃 About
ESSENTIALS
🎞️ Atom Time
🎞️ Atom Stack
🎞️ Atom Pi
KEYBOARDS / MOUSE
OTHERS / FUN
📃 Blinky
Compatibility
📃 DFB-X
📃 Glyphs
📃 Inject 2
📃 TAP
📃 WikiTest
